

How To Repair Cracked Crock-food Safe
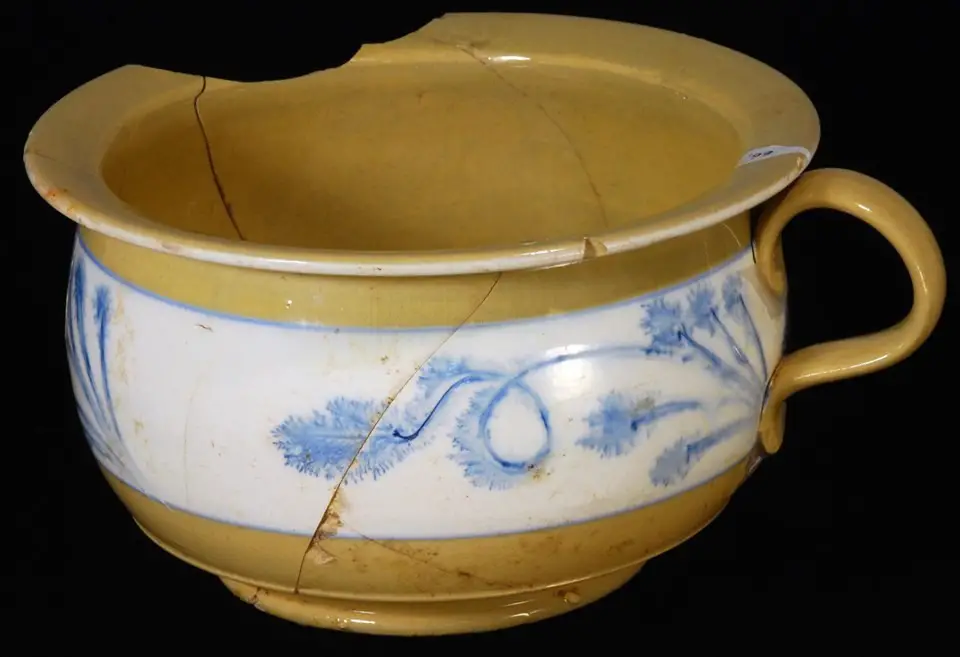
Just imagine that your favorite java mug that was gifted by someone special, or a pottery bowl that you have sculpted on your own with all your heart, has got a hairline fissure on information technology. It is heartbreaking, right? Only nothing is a problem when yous accept the appropriate solution correct at your hand. Yes, you lot can repair your ceramic pot quite easily at home by following some uncomplicated steps. Reviving your cracked pottery and reliving the memories again while sipping from your favorite coffee mug is going to give you inner joy.
Ceramic potteries are fragile enough when information technology comes in contact with any kind of roughness. And then, the offset thing you lot should do to save your potteries from such cracking defects is that you lot should handle them carefully. However, it is quite impossible to stay cautious all the time, and adventitious diplomacy may happen at whatever moment. If your pottery breaks into pieces, and so it might exist difficult or about impossible to revive information technology once more. But picayune or hairline cracks are something that yous can prepare if you follow specific tactics and tricks.
Hither in this article, we are going to hash out some magical hacks that tin give your favorite pottery piece a new life again. All that you demand to do is follow them step by step advisedly. And then now, let'southward get started.
Methods of repairing hairline cracks in pottery
There are several ways to repair a hairline crack in pottery. And here we are going to talk over some of them. So, let'southward get started with the methods that you can utilize to give your cracked potteries a new life:
1. Fixing pottery cracks at the greenware stage:
If you find a pottery crack at the greenware phase, then there are many scopes to repair it. Notwithstanding, it is quite challenging to find out a hairline cleft as they are too fine to be visible. And such fine cracks are enough to lead to the breaking of your pot. So, once you find the scissure, repair it immediately to foreclose further more fissures.

- Cracks tend to announced at structurally weak points of a clay pot, where the coils get attached or where 2 walls of the pottery go to meet. Added stress or carelessness while building your pottery may exist the reason for the formation of such cracks. So, have a minute checking at those places to find out a hairline crack.
- Once yous are successful in finding one, try fixing information technology when the clay is at the leather-hard phase. You have to commencement fixing the crack by roofing a lot more areas near the exact identify of cracking. Take soft clays and fill them into those places by compressing the dirt.
- To normalize the improver of wet clay with the previous clay torso and permit it dry, you can wrap information technology with a plastic wrapper. It will make the repairing clay stick onto the pottery body permanently. Information technology is meliorate not to apply water during this fourth dimension as excessive wet may exaggerate the scissure. Once the entire dirt pot is dry, you lot will be able to run into that you lot accept repaired the fractures successfully.
2. Repairing at the bone-dry phase:
You have to be a bit more than careful while repairing pottery cracking at the bone-dry stage. As at this bespeak, you don't have much choice to practise with your dirt body. Adding some moisture clay to repair the cracks is not going to assistance while bisque firing your pottery. Instead, the fissures might grow in this way. So, avoid adding soft clay, as you did in the previous method. If you want to repair a hairline crack at this bone-dry out stage, then follow the below stated process:
- Y'all can try paper clays to repair such points. Go some toilet papers to make paper pulp out of it. Then, mix it with the same dirt that you lot take used for making your pot. Make sure that you lot are not adding also much water into information technology. Let the mixture dry a little bit to have like consistency similar that of putty.
- Score the cracked area properly and utilize a small amount of water to avoid roughness. After this, you take to fill up the scored place with the paper clay mixture and let it dry before bisque firing it. Make certain that at that place are no cracks left on the pottery torso before opting for bisque firing.
3. Pegging method to repair hairline cracks:
Pegging is one of the efficient processes to repair pottery cracks with more mechanical integrity and strength. Before applying this technique, make sure that the thickness of your pot's wall is quite prominent to get through this repairing method. Beneath nosotros have provided detailed steps of the said technique in the course of a chart for your like shooting fish in a barrel understanding.
Steps | Processes | How to execute? |
| Step i | Detect the crack and grind the peg insertion | Find out the crack first. And so you take to grind channels on the side of the fissures to permit the epoxy to go clear so that the peg tin can penetrate through the walls of the pot. |
| Pace 2 | Prepare the copper peg for insertion | Cut a required amount of copper wire based on the measurement of the crack. Utilize a razor bract to insert through the cracks and make the gap wide plenty for plotting the copper wire. |
| Pace 3 | Start cementing the wire | Start cementing to stick the copper wire properly onto the crack. Oestrus the pot and associated epoxy at 120-140°F temperature to brand the epoxy melt a bit and penetrate through the cracked wall. Then, microwave the pottery for 2-5 minutes. Bank check if the epoxy has reached the other side of the crack. Remove the razor blade and insert the clamp earlier the epoxy hardens. Then, again estrus your pottery inside the oven to achieve optimum strength. |
| Step 4 | Make full in and cover the repaired place | Accept some filler epoxy and sand information technology with some rotary power tool to fill the lines of repair. |
| Footstep 5 | Finish off with coloring and glazing | Once you are washed with filling, hide that place by calculation some colors and glaze, and requite information technology a beautiful finishing. |
four. Repairing your cracked pot with milk:
This method is i of the easiest processes for fixing pottery cracks. This technique almost costs you zippo and also simple to practice at any time. Milk has an organic and natural protein glue in it, called casein. It gets separated from milk when it is heated and tends to stick onto difficult material and settle down there. And so, when this glue comes in contact with cracks, it settles in betwixt the two rough edges of the cleft.
Too, if you use your cracked pottery for food purposes, so it is the most effective and non-toxic procedure that is undoubtedly going to assist yous. However, how long this repair will final is something that yous cannot exist certain of. Merely sometimes information technology may terminal for years as well. Also, it is a much quicker way to gear up your ceramic cracks. And so, here is how yous can execute this process.
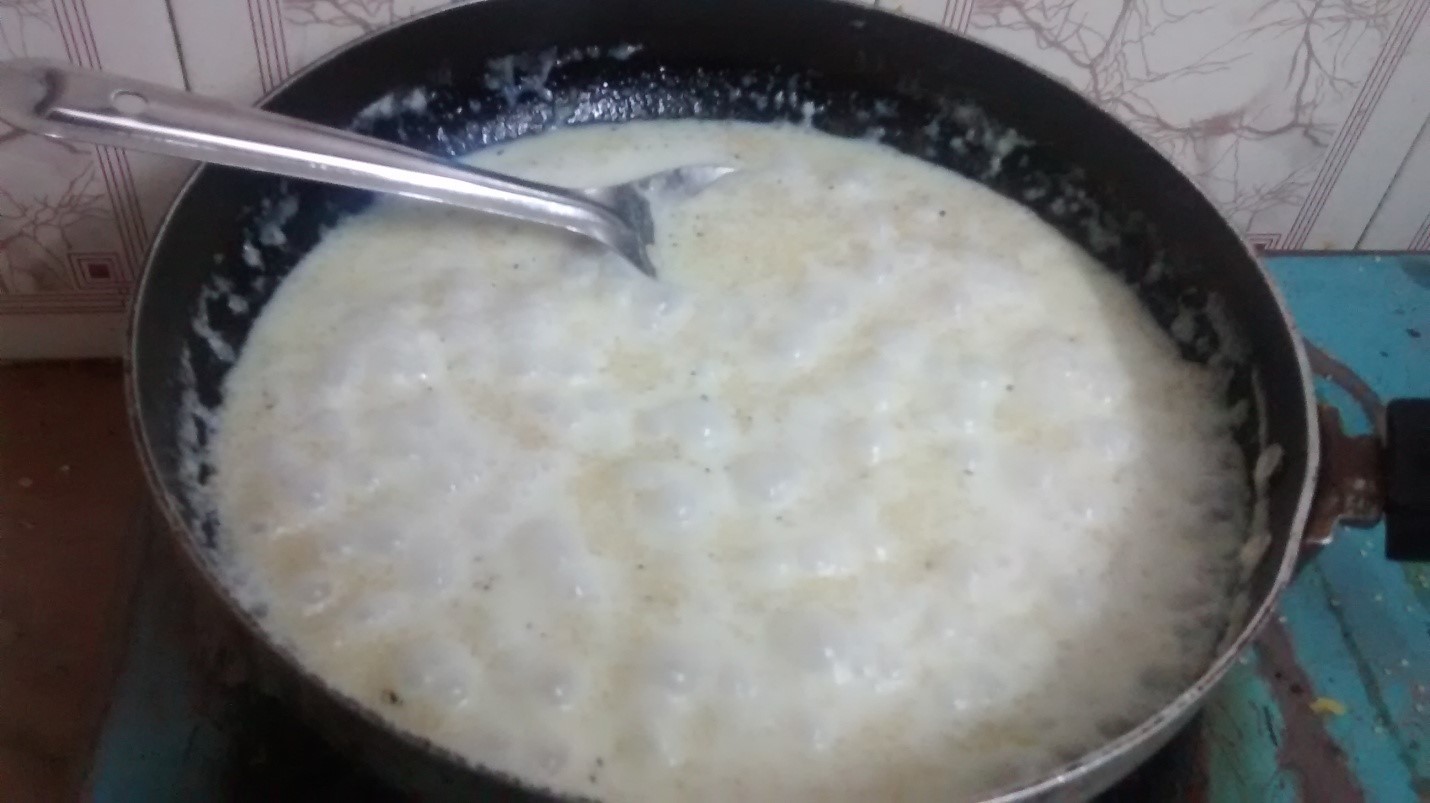
- Have the croaky pot and identify it in a bowl or saucepan. Make full the pan with milk and make certain that the croaky pottery gets drowned in the milk.
- Simmer the pan to bring the milk slowly to the boiling point. Don't boil it vigorously every bit it may cause more bang-up. Once the milk reaches the boiling point, let information technology boil for some time and simmer it once more for an 60 minutes.
- After that, place the milk aloof to become cold. After it has completely cooled down, remove your pot from the milk and allow it sit for i-two days earlier using it farther. Thus, you get cleanly repaired pottery.
5. Repairing using a cyanoacrylate gum:
Cyanoacrylate glue can exist used as a quick fix to repair hairline cracks in your pottery. This super gum sticks onto the fissures quite fast and creates a strong bail of adhesion past using only a small amount of it. This liquid mucilage is resistant to water and rut and adheres finely to the pot'southward body.
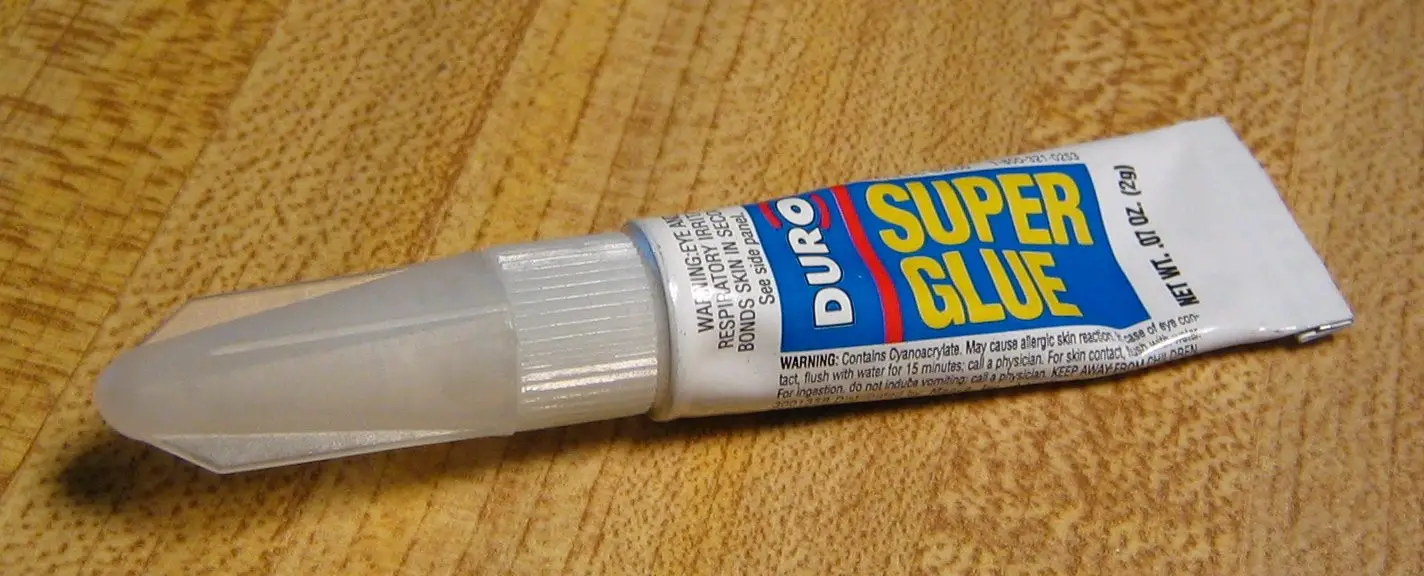
Though the mucilage works magically in sticking cracks, information technology is toxic to use. So, one should non strictly apply it to such ceramics that are used for food purposes. If you desire to fix the potteries used for ornament or other purposes, y'all can quickly set them by using this super gum. So, let us have a glance at the steps of this repairing technique:
- Find the cracked places on the pot first. And then, wipe the area with a tissue to make sure that there is no clay or oil left on the surface.
- Utilize the glue evenly to that place and make sure that you lot are not using your fingers to utilise this mucilage. Employ a stick or something like to it to apply the adhesive. You tin can use cyanoacrylate glues like the Gorilla 7700104 Super Glue Gel for a lovely finishing and superb adhering.
- Brand sure you take applied enough amount of glue to allow it for soaking properly.
- Afterwards 4-v seconds, while the glue is nonetheless wet, wipe off the excess adhesive with a tissue.
- Allow the pot sit for some time to become dry out, and after that, you will see that the cracks have disappeared.
6. Fixing with a 2-part epoxy:
Cracks as well tin can exist fixed using epoxy gum. Epoxy is a ii-part adhesive that consists of a resin and hardening amanuensis. It creates a firm bail that works quite well in sticking the cracks. So, fill in the fractured areas on the surface of the pottery by using the 2-part epoxy glue. Now, let's proceed with the process stride by step.
Steps | Processes |
| Step 1 | Fill a bucket with sand that will serve as the potholder. It will assistance you in holding the pot in an angled mode. |
| Step 2 | Take the croaky pot and smoothen its rough edges. Use sandpaper on the sides of the scissure and rub it onto the place evenly to go rid of raggedness on the pot'south surface. |
| Step 3 | Clean the place using cotton soaked with 91% of booze. Then, wipe off the surface area properly and allow it to go dry for some time. This action helps in sticking of the agglutinative firmly and too wipes away the backlog dirt and oil that might be present in the fissure. |
| Step 4 | Mix the 2-office epoxy glue properly by keeping it onto a plastic surface. Whisk the mix quickly, or else it can become dried. In one case blended well, fill information technology into the chipped section of the pot evenly with the help of a stick. Never utilize your fingers to apply the glue, every bit its powerful agglutinative nature may coalesce your fingers. |
| Stride 5 | Permit the agglutinative set for some more time to become stale properly, and after 15-twenty minutes once information technology is completely dry out, scrape off the dried agglutinative using a razor or pocketknife. Later that, use sandpaper over the place to shine out the surface properly. |
| Footstep six | Finish it off by applying paint onto the cracked area of the pot. You tin can also apply transparent acrylic gloss on the color for better finishing. |
Wrapping upwardly:
Why throw away your favorite pottery piece when you tin fix it on your own that as well quite effortlessly? Only utilise the methods mentioned higher up to give a new life to your pot. Exist careful enough while working with such fragile objects. Damage may happen anytime.
So, avert keeping your pottery pieces on the edge of a table or rack. Also, don't pour piping hot water or whatsoever liquid straight into ceramic pottery. These will lead to instant hairline cracking or fifty-fifty breaking of your pot.
However, in case your pottery gets a hairline crack, these hacks volition rescue you from it. Nosotros promise that the afore-said methods and techniques are undoubtedly going to help you with fixing your pottery drove. Happy sculpting!

How To Repair Cracked Crock-food Safe,
Source: https://spinningpots.com/how-to-repair-hairline-crack-in-pottery/
Posted by: joneslicused.blogspot.com
0 Response to "How To Repair Cracked Crock-food Safe"
Post a Comment