

How To Repair Fiberglass Boats
Have y'all noticed a hole in your boat's hull?
Seeing your boat damaged can send you into a panic, peculiarly when you call up about how complicated and expensive it must be to repair a fiberglass boat hull.
Admittedly, fiberglass is a tough fabric, and once it is damaged, yous will have to put in more work to repair it than y'all would, say, a woods boat.
Merely, the good news is small holes and cracks on a fiberglass hull are completely repairable. Even if yous don't consider yourself handy, repairing minor damage on your gunkhole is a skill you should acquire.
In this article, I volition show you how to repair a fiberglass boat hull from exterior. Doing your repairs exterior of the gunkhole is the best strategy for dealing with a small hole or cleft that hasn't gone past the hull to the gunkhole's interior.
Here, I will explain how to repair your fiberglass hull using layers of fiberglass material as a long-term solution to seal the damage.
And then, without further ado, let'due south get started.
Things you lot volition demand for fiberglass hull repair
- Polyester resin fiberglass repair kit
- Fiberglass rubbing compound
- Acetone
- 7 ½ fiberglass cloth
- Plastic wrap
- ten-ounce roving
- Masking record
- Disc sander with a medium grit sanding disc
- Pair of scissors
- Gel coat
- Soft rugs
- Paintbrushes
- Extra fine-grit wet-dry sandpaper
- Low-cal cardboard
Step-by-Pace Guide To Repair Fiberglass Gunkhole Hull From the Exterior
Follow these steps to repair a damaged fiberglass gunkhole hull.
Pace 1: Grind effectually the hole
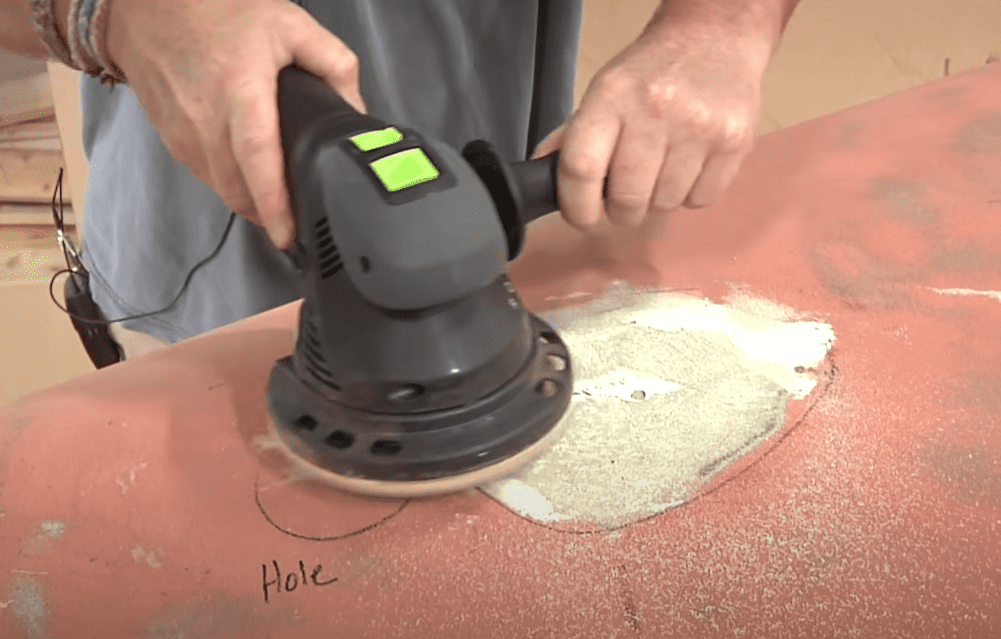
Apply a disc sander and a medium-dust sanding disc to grind around the pigsty. This helps to expose the undamaged fiberglass underneath and create a stiff base to identify the fiberglass patch for repair.
Smoothen the edges of the hole into the surface of the exposed fiberglass. The exterior edges of the original hole should exist at least 3 inches wider than the inside edges. Tapering the pigsty ensures that the fiberglass patch strongly adheres to the surface.
Step 2: Clean the damaged expanse

Use a soft rug to wipe off the dust after sanding the hole to satisfaction. With all the dust wiped out, soak another soft rug in acetone and use it to wipe around the damaged hole.
Be extremely conscientious when working with acetone. This product is flammable and should only be used in a well-ventilated area.
Dispose of the rugs containing acetone outside every bit soon as you finish using them.
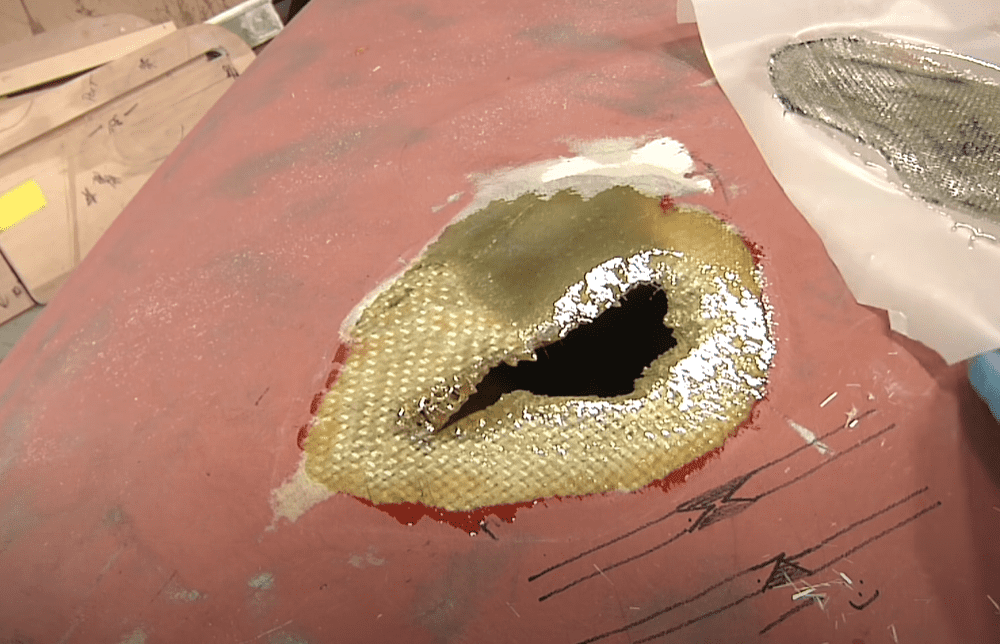
Step 3: Back up the hole
Fill the hole with a piece of cardboard before applying the fiberglass fabric. Cutting the low-cal cardboard to be two inches bigger than the pigsty.
Ideally, the fiberglass fabric should not stick to the cardboard paper. To help with this, encompass the piece of paper-thin with plastic wrap and record the wrap, so information technology adheres.
Insert the wrapped cardboard into the hole completely. Suit the piece of cardboard every bit needed to adhere to the shape of the pigsty. Then, hold information technology in identify using masking tape. The cardboard should fit in the pigsty snugly to ensure a strong patch.
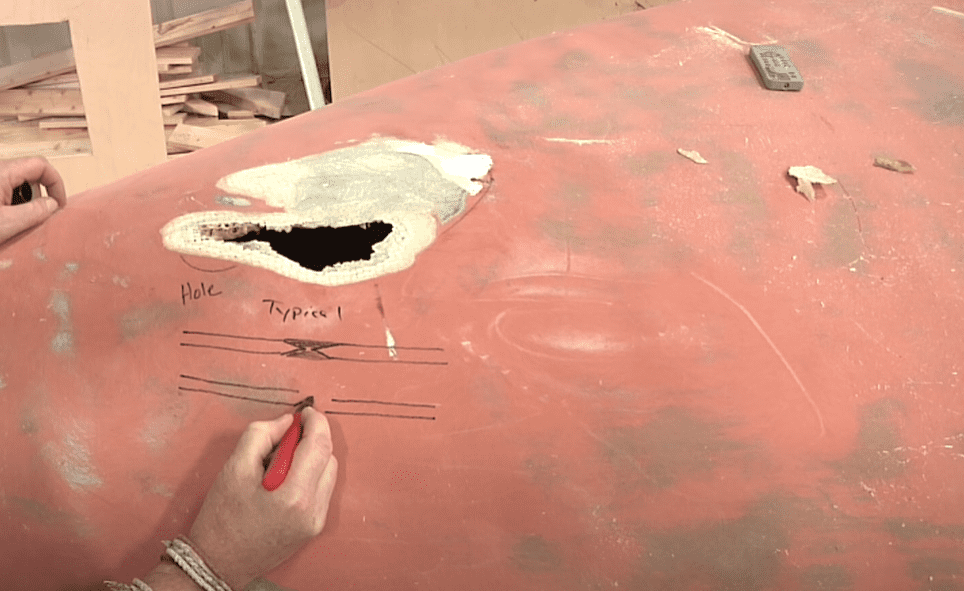
Step 4: Prepare the patch
In this repair projection, the goal is to patch the hole with fiberglass material and woven roving.
To get started, cut a piece of x-ounce roving to the size of the hole's inside diameter. You will patch up the pigsty with several layers of roving. Then cut several more pieces of roving, making each successive piece slightly larger.
The number of roving pieces you will need will depend on the hull's thickness. When layered one on top of the other, the roving pieces should get to a point where they are wink or level with the undamaged surrounding hull surface.
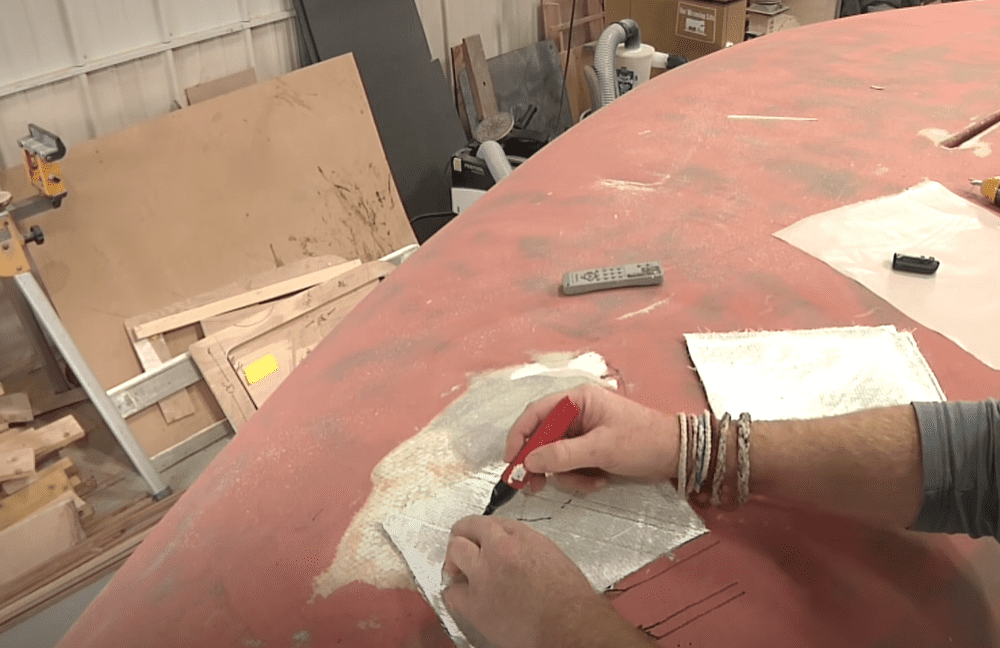
One time you have prepared enough roving pieces, cutting a piece of the fiberglass cloth which will act as the final pinnacle layer of the patch. The goal is to blend the fiberglass cloth into the hull's fiberglass surface.
Lay the roving and fiberglass pieces on a clean piece of work surface. Arrange them in social club from the smallest to the largest slice.
Step v: Prepare the resin

Follow the manufacturer's instructions to mix the hardener and polyester resin. This resin mix hardens up fast, and you should only prepare a small batch at a time that y'all can utilize chop-chop.
Keeping the temperatures in your workspace at not lower than 600 F will help dull downward the hardening process.
Step 6: Use the layers of roving

With the pieces of roving and resin ready, it is time to patch upwardly the hole.
Place the smallest piece of roving on a piece of cardboard. Use a paintbrush to apply resin to this first layer of roving. Thoroughly brush the resin and then that it saturates the piece of roving.
Lift the roving and identify information technology on the gaping hole on the boat's hull. Use the paintbrush and gently printing the roving to adhere to the hole and surrounding hull. Continue to massage the roving with the paintbrush for a few minutes to help the slice adhere.
Pick up the side by side piece of roving and use enough resin as y'all did the first piece. Then, place this piece on top of the commencement piece on the hole. Massage and record the border as in a higher place.
Repeat this process for all the pieces of roving y'all have prepared. In the end, the final layered patch should lay level to the surrounding hull.
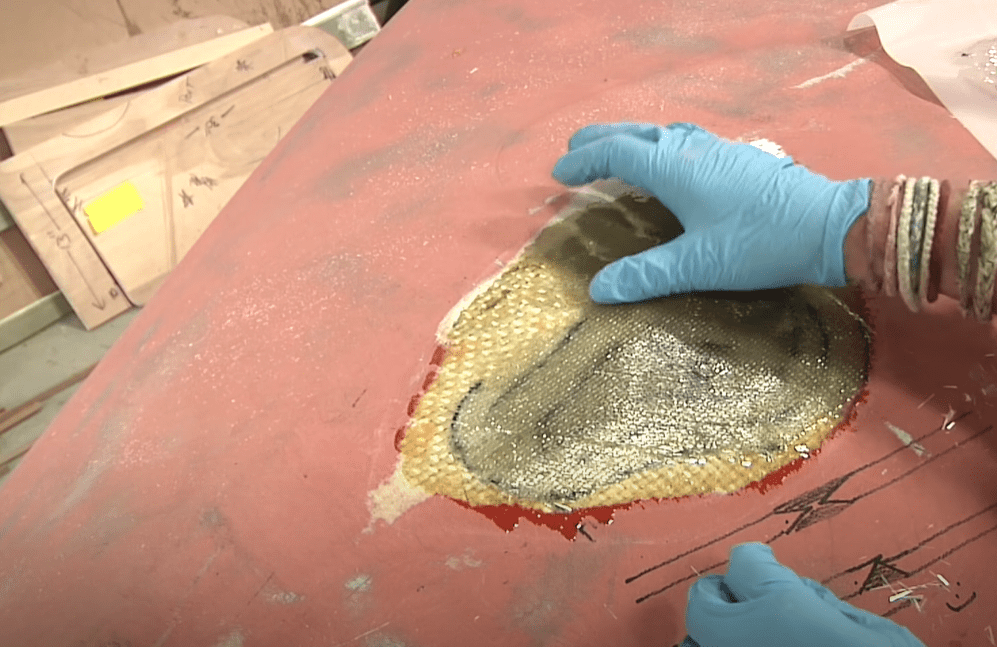
Step seven: Apply the fiberglass cloth
The last layer of the patch will be the fiberglass textile. Option upwardly the piece of fiberglass fabric and place information technology on elevation of the layers of roving.
You don't need to apply resin to the fiberglass cloth. But utilize the resin-saturated in the roving pieces. Apply a paintbrush to massage the fiberglass textile into the roving.
If the fiberglass cloth doesn't seem to adhere to the hull around the edges, you lot can add a small amount of resin. Be careful non to use also much resin, which will eventually weaken the patch.
The resin-saturated roving and fiberglass will plow a nighttime hue; don't worry about this. It only means that you have applied enough resin to reinforce the patch.
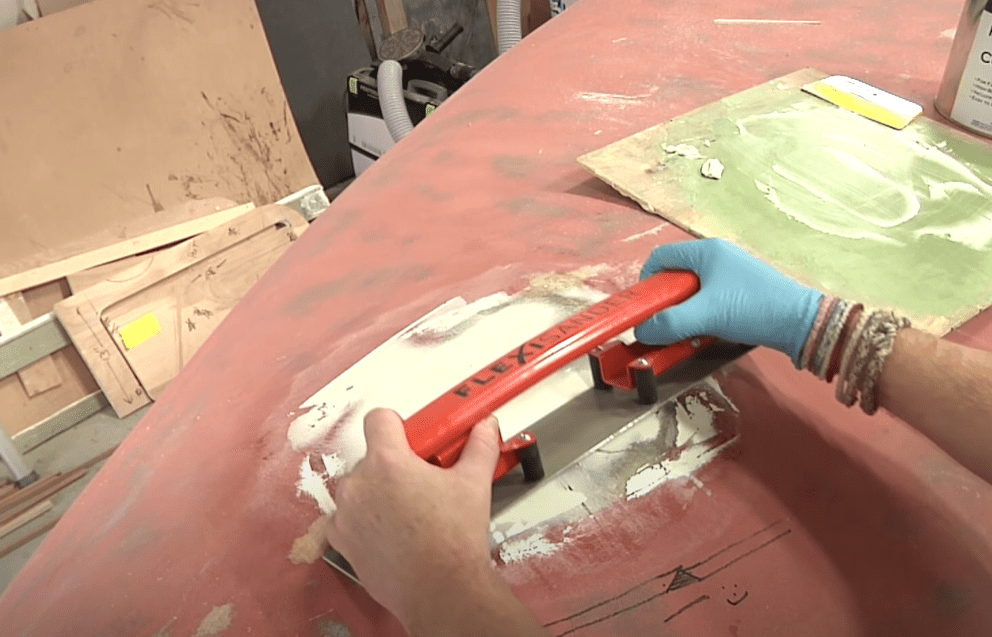
Pace 8: Allow the patch to dry and remove irregularities
Requite the patch enough fourth dimension to dry. Ideally, you should let the resin a drying time of at least x hours or as recommended past the manufacturer.
Use a disc sander with a medium-dust sanding disc to shine out the surface and edges of the patch. The idea is not to grind down the patch but to slightly sand it to exist level with the hull's surface if necessary.
Farther, shine the surface of the patch using a very fine-grit wet-dry out sandpaper. Do this gently, taking your time to remove any lingering irregularities.
Step 9: Clean the patch

Clean it with acetone one time the patch is completely level with the surrounding hull. Exist sure to keep your work area well-ventilated and safely dispose of any rugs that come into contact with acetone.
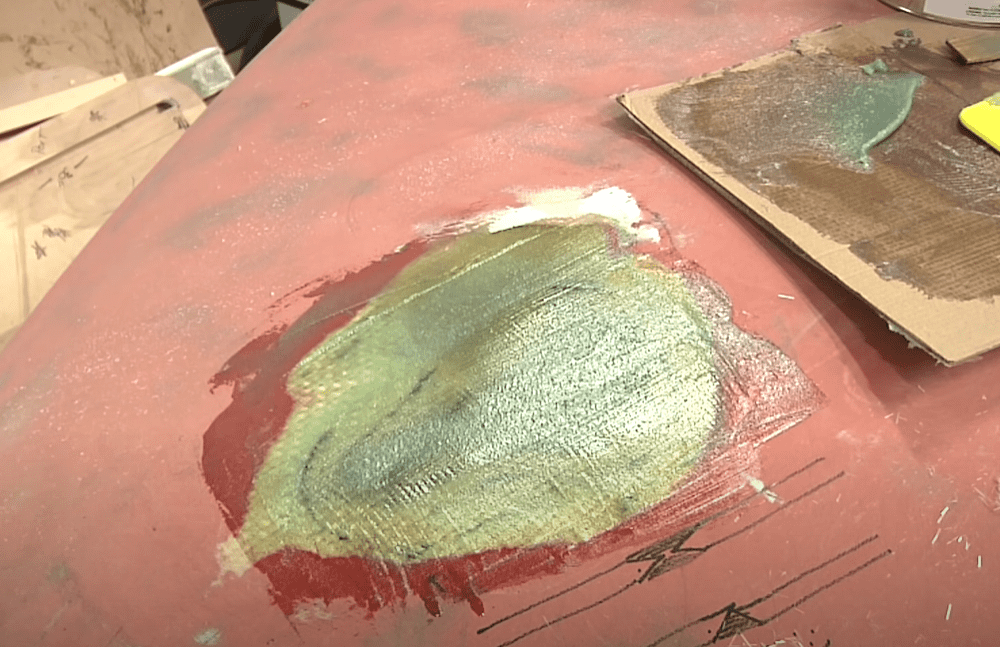
Footstep ten: Use the gel coat

The gel coat is the last finish that helps seal the patch and bring it to lucifer with the hull's color and texture.
Follow the manufacturer's instructions on preparing the gel coat. Employ a thin coat of the gel onto the patch. Castor the gel over the patch, ensuring that the layer is even. One layer of gel coat is enough.
Next, apply plastic wrap over the layer of wet gel, pressing down and smoothing the wrap to remove air bubbling and crinkles. Apply two more layers of plastic wrap over the patch, ensuring no air bubbling are trapped underneath.
The plastic wrap plays an important office in ensuring the gel glaze dries smoothly to resemble the original fiberglass gunkhole hull.
Step 11: Remove excess gel coat
Allow the gel coat to dry for at least ten hours or according to the manufacturer'due south instructions. Then, take off plastic wrap to reveal a smooth patch surface.
Utilise very fine-grit wet-dry sandpaper to sand down the gel-coated patch. This will remove excess gel and ensure that the patch is at the aforementioned level as the hull's surface. Use plenty water when sanding the patch to avoid scratching the gel layer.
Step 12: Make clean and wax the hull
Use a wet fabric to make clean the repaired surface area.
Then, apply fiberglass rubbing chemical compound to this area and use the disc sander'south buffer to polish the surface.
Lastly, utilise a wax product such as practiced old automotive wax to shine the newly repaired spot.
Summary: How To Repair Fiberglass Boat Hull From Outside
Knowing how to repair a fiberglass boat hull can avert a potential boating disaster and even save you some coin. You tin can apace fix a hole you hadn't noticed and save the bigger repairs for the professionals. I strongly recommend storing boat repair materials and tools on lath in case of an emergency repair. I hope this guide will come up in handy when yous need to ready a hole in your boat'southward hull. Happy sailing!
Source: https://www.triumphboats.com/patching-fiberglass-boat/
0 Response to "How To Repair Fiberglass Boats"
Post a Comment